Opera Reader: Paging the Web
Around 2000 years ago, the Romans developed the codex. Different from scrolls – the previously accepted literary format – the codex had pages that were bound together into what we today call books.
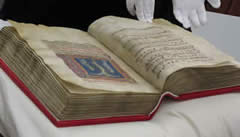
The codex gradually replaced scrolls, and by the 5th century scrolls were no longer used in Western cultures. There are good reasons for this: the codex is compact, sturdy, and you can quickly go to the start, end, or anywhere in between. They are a lot more portable and easier to manage than scrolls. As such, the codex was the "killer app" of the 5th century.
Since then, computers have taken a step backwards, with software – most notably web pages – adopting the scroll metaphor and offering scrollbars for navigation up and down our content. This is an easy solution for the software, as it allows all content to be accessible without needing to worry about pagination, but it leads to chopped lines of text, and doesn't work so well on mice-less devices. And, mankind misses the beauty of a nicely laid out page.
We've more recently seen a step in the right direction, with a proliferation of e-reader devices (such as the Amazon Kindle) with next page
and previous page
buttons allowing users to read e-books in a more book like
fashion. But the Kindle is a walled garden: wouldn't it be good to have an open technology that allows us to present any content we choose in this manner?
To this end, we'd like to present Opera Reader, which implements CSS3 extensions that allow content to be split into pages. These pages can be turned
in a natural manner through gestures rather than point and click, figures can be floated to the top and bottom of pages, and the documents have a sense of themselves and their environment; they know about documents above, below and on the sides. The new CSS features are described in the CSS Generated Content for Paged Media module. In this article, we'll show you how you can paginate common HTML files with just a few lines of CSS.
In short, Opera Reader is the codex for the Web. We think it has the power to dramatically improve the way in which web content is consumed, by presenting it in a much more compelling fashion. Read on, and let us know what you think.
Getting started
Opera Reader currently exists inside special versions of the Opera Browser. First, get Opera Reader by downloading it from the menu on the left. The difference between these builds and the normal Opera browser is that they can create paginated reading experiences – especially compelling on tablets and TVs.
Next, you'll need some examples to view in Opera Reader, so you can see how it works. The document you are reading is a small tutorial of its own, and you can also find an extended version.
In Opera Reader, you are able to control the page browsing via swiping the page in different directions on touch screen devices, using the arrow keys and the PgUp/PgDn keys on a device with a keyboard, and by activating the on-screen control buttons in any way you choose to do so. If you have a mouse, you can also navigate by dragging pages. This means that, in these special builds you cannot select text with the mouse. (If you'd rather select text than navigate, type opera:config in the address bar, and turn off Scroll is Pan.)
The basic premise of Opera Reader
Opera Reader works via some specific CSS3 extenstions that turn your usual endlessly scrolling single page of content into multiple pages that can be navigated between. They are currently implemented using the -o- vendor prefix, so browsers that don't support the technology will just ignore them completely – no harm done. For example, you can specify a block of rules that will only be applied to Opera Reader builds using a media query containing a special -o-paged media type:
@media -o-paged {
  /* specific Opera Reader rules */
}
With that covered, let's now start walking through some code examples.
Splitting content into pages
To split content into pages, we need to specify a fixed height for our document, and direction for the pagination to flow in:
@media -o-paged {
  html {
    height: 100%;
    overflow: -o-paged-x;
  }
}
Here we specify that the height of the <html> element should be constrained to 100%, which is the height of the window, and that the overflow should go into extra pages along the x axis (i.e., horizontally). This is all that is needed to break the document up into paged media! (example)
The most common reason for lack of pagination is when authors forget to constrain the height. The height can be constrained by setting the height property, as above, or by setting position: absolute; on the element in question. (example)
The four custom values that Opera Reader provides for overflow are:
-o-paged-x-o-paged-y-o-paged-x-controls-o-paged-y-controls
These are fairly self-explanatory – x and y indicate the direction you need to move in to get to the overflow pages, and including the controls keyword makes Opera Reader display default controls that can be used to control your movement through the pages without a touch screen, plus a page counter. You can customise the Opera Reader controls by designing your own buttons and wiring them up using the simple API, discussed later on.
Adding padding to our pages
Books typically have some space between the text and the edges of the page. We can add some space by setting padding on the paged element. Whe doing so, we must rrember to also use the border-box as reference::
@media -o-paged {
  html {
    height: 100%;
    overflow: -o-paged-x;
    padding: 5%;
    height: 100%;
    box-sizing: border-box;
  }
}Persisting elements across pages
In the examples above, all content in the document is split into pages. In some cases,owever, you want part of the page to persist across all pages – a header or sidebar perhaps. To do this, we set the overflow: -o-paged-x; property just on the part of the content we want to be paged:
article {
  overflow: -o-paged-x-controls;
  position: absolute;
  top: 1em;
  bottom: 1em;
  left: 0;
  right: 0;
}
We have used this technique in the document you are reading; the menu on the left stays while the article itself is paged. (test document)
Page breaks
Part of the reason why browsers cling to scrollbars is that the
alternative – pagination – is hard. There is no optimal
formula that guarantees good-looking pages. However, authors can do a
few things to help. Using break-before, break-after
and break-inside, authors can indicate where page breaks
are permissible and where they are not. For example, we can easily
express that page breaks should be avoided right after a heading,
which makes sense:
h1, h2, h3 {
  break-after: avoid;
}
Multi-column layout
The CSS3 Multi-column Layout Module really comes into its own with paging content. When viewed in Opera Reader, the main content of the article is displayed in multiple columns at an optimal width, rather than a set number of columns. The main content column shrinks and grows with the screen width, therefore, depending on the width of the browser, the number of columns will vary. The column ruleset in this article is:
article {
  position: absolute;
  top: 1em; bottom: 1em;
  left: 14em; right: 2em;
  overflow: -o-paged-x;
  columns: 25em;
}
Figures: floats and column spans
Multi-column layouts are often used in newspapers and magazines. Figures are commonly wider than a column, and will therefore span across two or more columns, and they are often found in the top corner of the article. This is easy to specify:
figure {
  column-span: -o-integer(2);
  float: -o-top-corner;
}-o-integer() allows us to specify an maximum number of columns for the image to span across, in this case two. (We hope that other browsers also will support integer values on column-span so that we can remove the -o-integer prefix.) If column-span is set to 3 and there are only 2 columns, spanning will occur across both columns.
The float property supports the following new values:
-o-top/-o-bottom: float to the top/bottom of the natural column.-o-top-corner/-o-bottom-corner: float to the top/bottom corner of last column.-o-top-next-page/-o-bottom-next-page: float to the top/bottom of the first column of the next page.-o-top-corner-next-page/-o-bottom-corner-next-page: float to the top/bottom of the last column of the next page.
Full-page figures
Full-page figures can be achieved by floating an element to the top/bottom, and making it span across all columns, and setting the height/width to 100%.
figure {
  column-span: all;
  float: -o-top-next-page;
}(test document, move to next page to see effect)
Moving figures into the padding area
Sometimes, in newspaper or magazine layouts, images bleed into the edges of pages. This is achieved in our example with negative margins – for example we've set padding on the text like this:
html {
  overflow: -o-paged-x;
  height: 100%;
  box-sizing: border-box;
  padding: 5%;
}
Then moved some of our images into the padding area with negative margins:
img.bleed {
  margin: -6% -6% auto -6%;
  width: 112%;
}Specifying other navigation options
In the paged mode used by Opera Reader, we can specify navigation to other documents appearing to the top, right, bottom and left of the current document. To indicate which documents are reached by navigating in different directions, a new at-rule has been added, which can contain four custom properties. Some of these properties work in conjunction with <link> elements in the <head>, with specific rel values.
For a start, let's consider the following <link> elements:
<link rel="home" href="http://foo.com">
<link rel="previous" href="http://bar.com">
The new at-rule – @-o-navigation – can look something like thhis:
@-o-navigation {
  nav-up: -o-url-doc(/);
  nav-down: url(a1.html);
  nav-right: -o-link-rel(next);
  nav-left: -o-go(back);
}
The four new properties are pretty self explanatory – nav-up is what you want to navigate to when the page is moved up, and so on. Let's now talk through the four different values that the properties can take:
-o-url-doc(path): The path specified is a relative path to the HTML document, for example/to go to the root document.url(path): The path specified is a standard URL to a file, and can be of any type thaturl()normally accepts (for example inbackground-image: url();).-o-link-rel(value): The value is arelattribute value from a<link>element. For example, when you specifynext, the browser looks for a<link>element in the<head>, and then takes itshrefvalue as the document to navigate to.-o-go(value): in this case, the value can beforwardorback– these instruct the browser to go forward or back in its history.
Scripted paging
As described earlier, Opera Reader provides a basic set of controls for navigating the pages when you specify the controls keyword, e.g. -o-paged-x-controls. If you don't specify the default controls, you can create your own navigation controls and wire them up using the Opera Reader API. Let's look at how to do this in more detail.
To this end, we have created a custom navigation menu that is hidden by default (using display: none;), and only displayed when in paged media mode. It looks like so:
The HTML basis for this is three simple links:
<a href="#" id="prev" onclick="prevpage()">
   Previous</a>
<div id="count"></div>
<a href="#" id="next" onclick="nextpage()">
   Next</a>
So how do we wire this up? Here is some JavaScript code:
(function(doc){

var x = doc.getElementById('x'),
  paged = doc.getElementById('paged'),
  prev = doc.getElementById('prev'),
  next = doc.getElementById('next'),
  // immediately invoked function expression to
  // take care of initial page position
  computeCurrentPage = (function(){
    x.innerHTML = paged.currentPage + 1 + " of " + paged.pageCount;
  }());

function updateCurrentPage(e){
  x.innerHTML = e.currentPage +1 + " of " + e.pageCount;
}

function nextPage(){
  paged.currentPage++;
}

function prevPage(){
  paged.currentPage--;
}

paged.onpagechange = updateCurrentPage;
next.onclick = nextPage;
prev.onclick = prevPage;

}(document));
As you can see this is pretty simple: the API exposes simple properties of the paged content, allowing us to move forwards (paged.currentPage ++) and backwards (paged.currentPage --), and access current page and total page count information (currentPage and pageCount). A simple event – onpagechange is combined with a custom function to update the information each time the page is changed.
Summary
And so ends our introduction to Opera Reader, and paged web media. Please let us know what you think, and share your examples with us: we are still working on perfecting the features of this exciting new technology, and exploring the limits of what is achievable!